


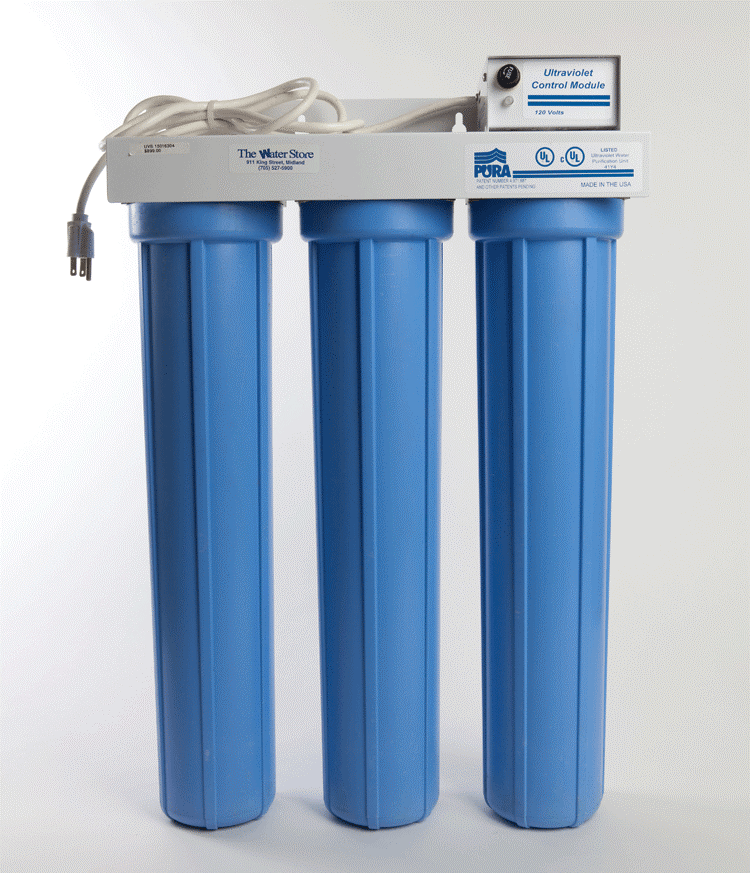

The installation location needs to be considered carefully as this unit can only be installed horizontally, after your pressure tank but before the water splits off to your hot water heater and other fixtures. If you have an outside hose bib, if possible, the pipe servicing the hose bib should come off before the Ultra Violet System to maximize filter life through the system and not waste capacity on the water used for watering the lawn. The other installation parameter that needs to be considered is that you will need at least 20" of space above and 20" below to facilitate bulb and filter changes as well as routine maintenance.
Start by assembling the UV System
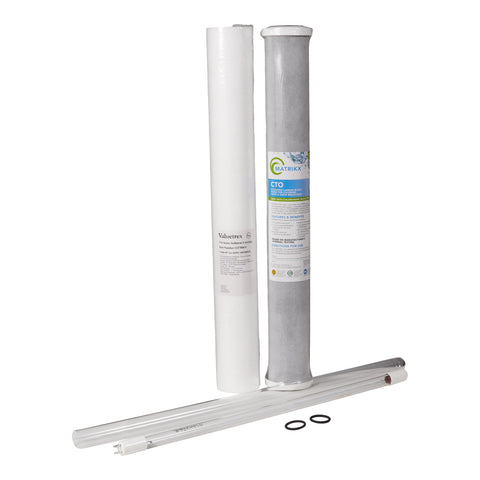
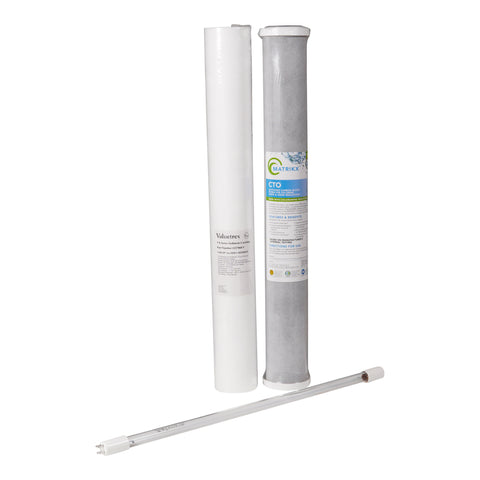
1. Remove the sumps from the UV Head and set aside.
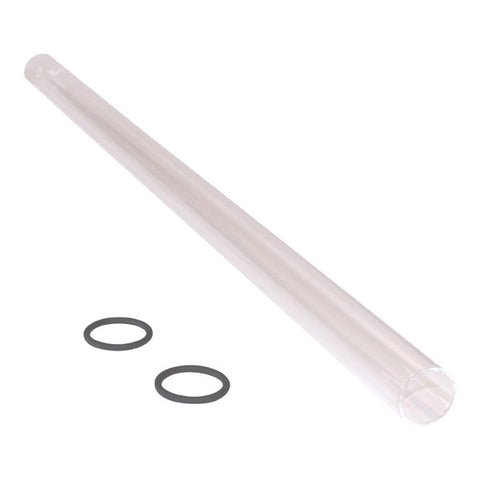
2. Remove Quartz Sleeve from packing tube. Do not touch sleeve with bare hands. While holding middle of quartz sleeve with one hand, slide
protective bag with other hand to expose open end. Prepare quartz sleeve by lightly sanding outside edge. Warm o ring with a heat gun or blow dryer for 1 minute. When handling the quartz sleeve do not touch it with your bare hands, handle with a cloth or protective bag.
3. Apply even pressure to push the quartz sleeve into the UV head. To avoid breakage, make sure quartz sleeve goes in straight by pushing it with a slight twisting motion. As quartz sleeve passes both "O" Rings, resistance will be felt. Remove protective bag from quartz sleeve. Re install stainless steel Channeling Sleeve and Sleeve Gasket and sump to protect quartz sleeve.
4. Re install sumps for sediment and carbon filters with cartridges in place, making sure to moisten o rings.
CAUTION: TIGHTEN SUMPS BY HAND ONLY.
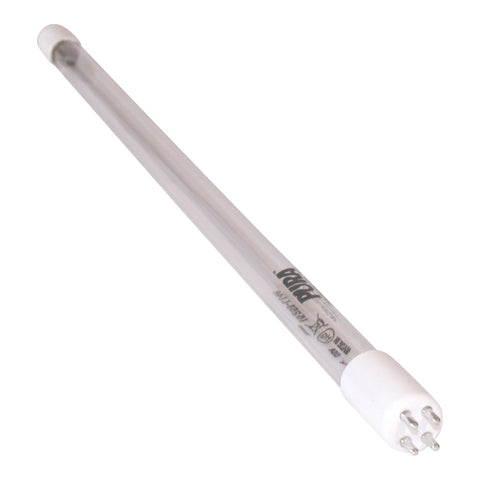
5. NOTE: When handling, hold UV lamp by ceramic ends only. Do not touch glass. Remove UV Lamp from packing tube.
6. Connect UV lamp into four-pin socket located at the bottom of UV control module.
7. Carefully insert the UV control module with UV lamp through mounting bracket into the quartz sleeve and tighten 4 screws to depress safety plunger.
8. Install in line into plumbing after the premises pressure tank but before water branches off to hot water heater. Be sure to install a shut off valve before and after UV system for maintenance purposes. Any plumbing supply store can supply fittings from your plumbing to the 3/4" threaded female connection at either end. The water needs to enter the end with the sediment filter (left side) and exit the side with the UV
Bulb (right side).
UV System Start up
1. Plug system into an electrical outlet. If the LED Indicator does not light up within one minute, verify UV lamp is securely plugged into UV control module and safety plunger rod is in place.
It is normal for the LED indicator to flicker slightly, system takes 1-2 minutes warm up time for UV bulb to shine at full strength.
2. Turn on water supply and check for leaks.
3. Flush system, connectors, and water lines for several
minutes to remove carbon fines.
4. Disinfect before use. See our video on How to Disinfect the Plumbing in Your Home at http://www.waterstoresgroup.com/blog/... before drinking the water.
NOTE: When an ultraviolet water treatment system is unused for several hours, water within system could become warm. This is a normal condition.
Shop Pura Replacement UV Lamp and Filters
For more great information about water treatment, subscribe!